"If you’re building Docker images on your laptop for tagging release, be in shame, and then change your behavior" - Kelsey Hightower, 2018
That’s right! If you are building Docker images in your local machine, you are doing it wrong. We don’t want to build anything on our laptop. When we are tagging a new release for production, staging, or even for a dev environment, the build should trigger automatically to save time and avoid the hassle. But Docker builds in a CI environment might not be faster than our local machine if we don’t configure it properly. In this write-up, I’ll try to share my experience on how I achieved more speed building Docker images in a CI environment.
How do we do it from local machine? 🛠
We don’t want to be in shame. But let’s see what is it like building and pushing a Docker image from local machines to Docker registries.
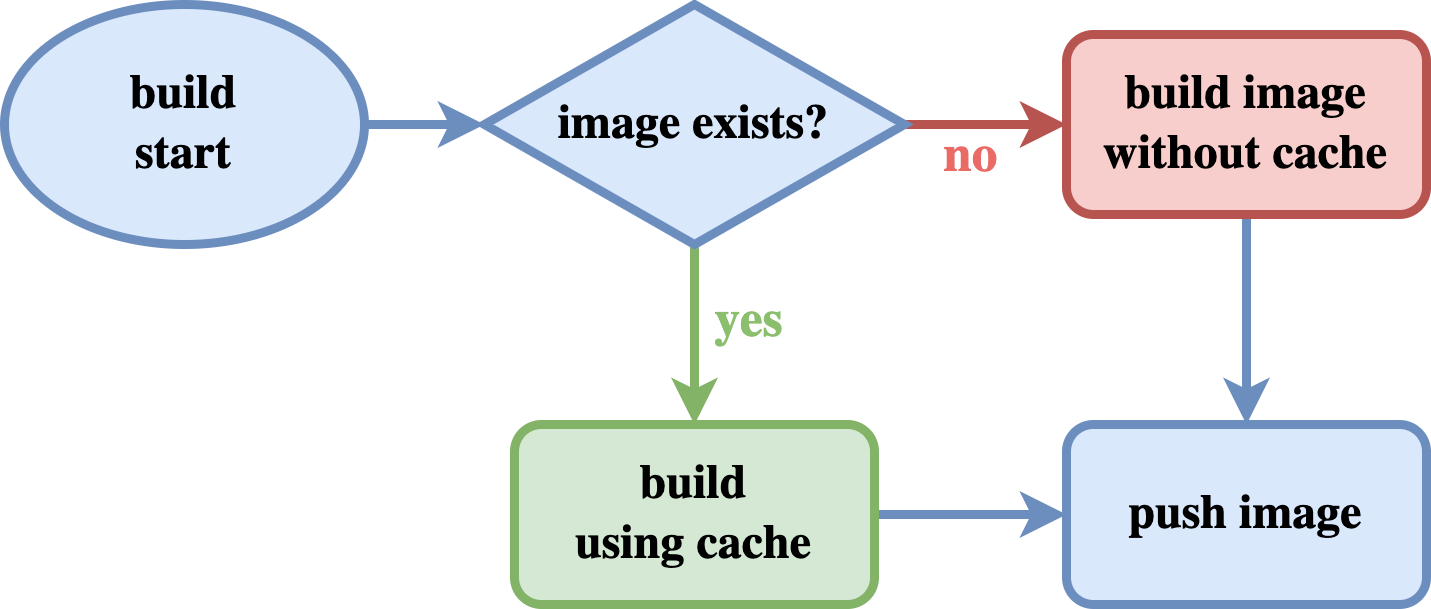
Docker uses layer caches to build. If we are building an image from a Dockerfile it will try to check if it already has cache present in the machine. If not it will build the image without any caching, but it will take a bit longer.

Docker image building flow
Building docker images in the local machines take much less time to finish if we have built the same image before. That’s because Docker reuses the layers from previously built images which are currently present in our machine.
What’s up with CI environments? 🏁
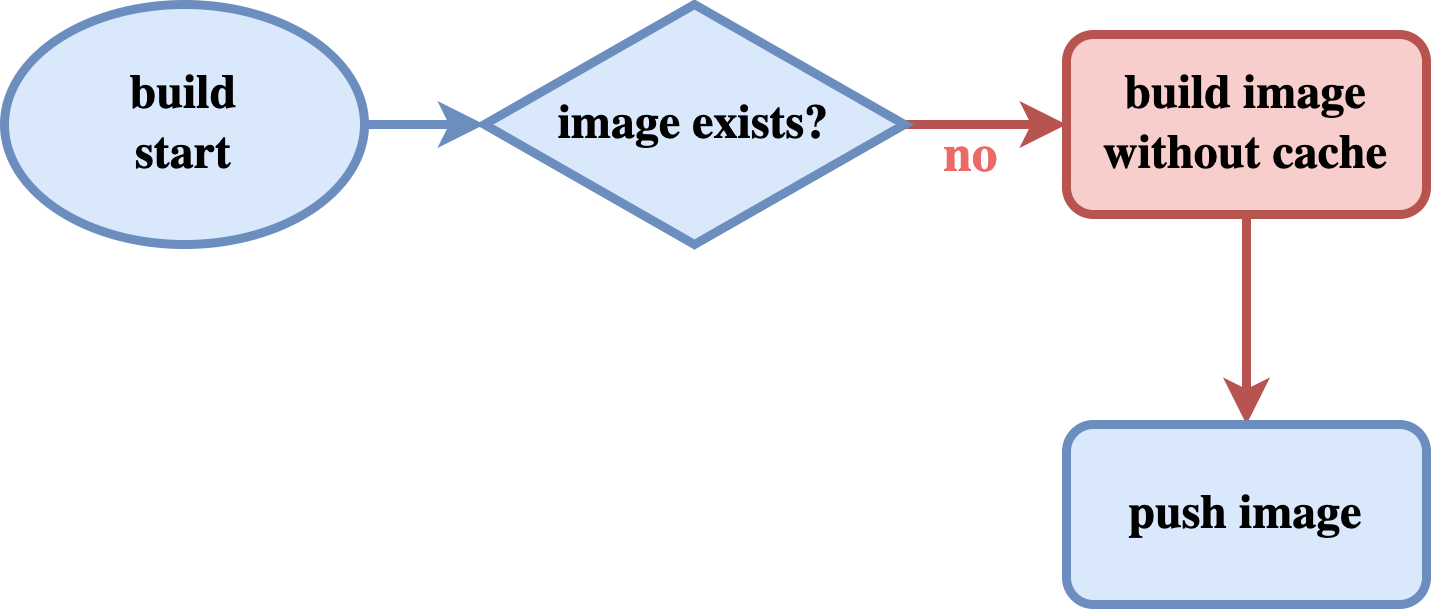
In a CI environment, things work a bit differently. Because each time a new machine spawns to run a corresponding job, and then destroy/clean up everything after the job is finished. Even if we are building the same image, again and again, Docker cannot use the layers from the previously built images since that was on a separate machine. So the above picture looks like this in a CI environment:

Docker image building flow when the image doesn’t exist
In this scenario, there’s no “yes” path, the image doesn’t exist by default. So, there’s only one way forward to the build stage. But the process can speed up.
How can we achieve the speed? 🚅
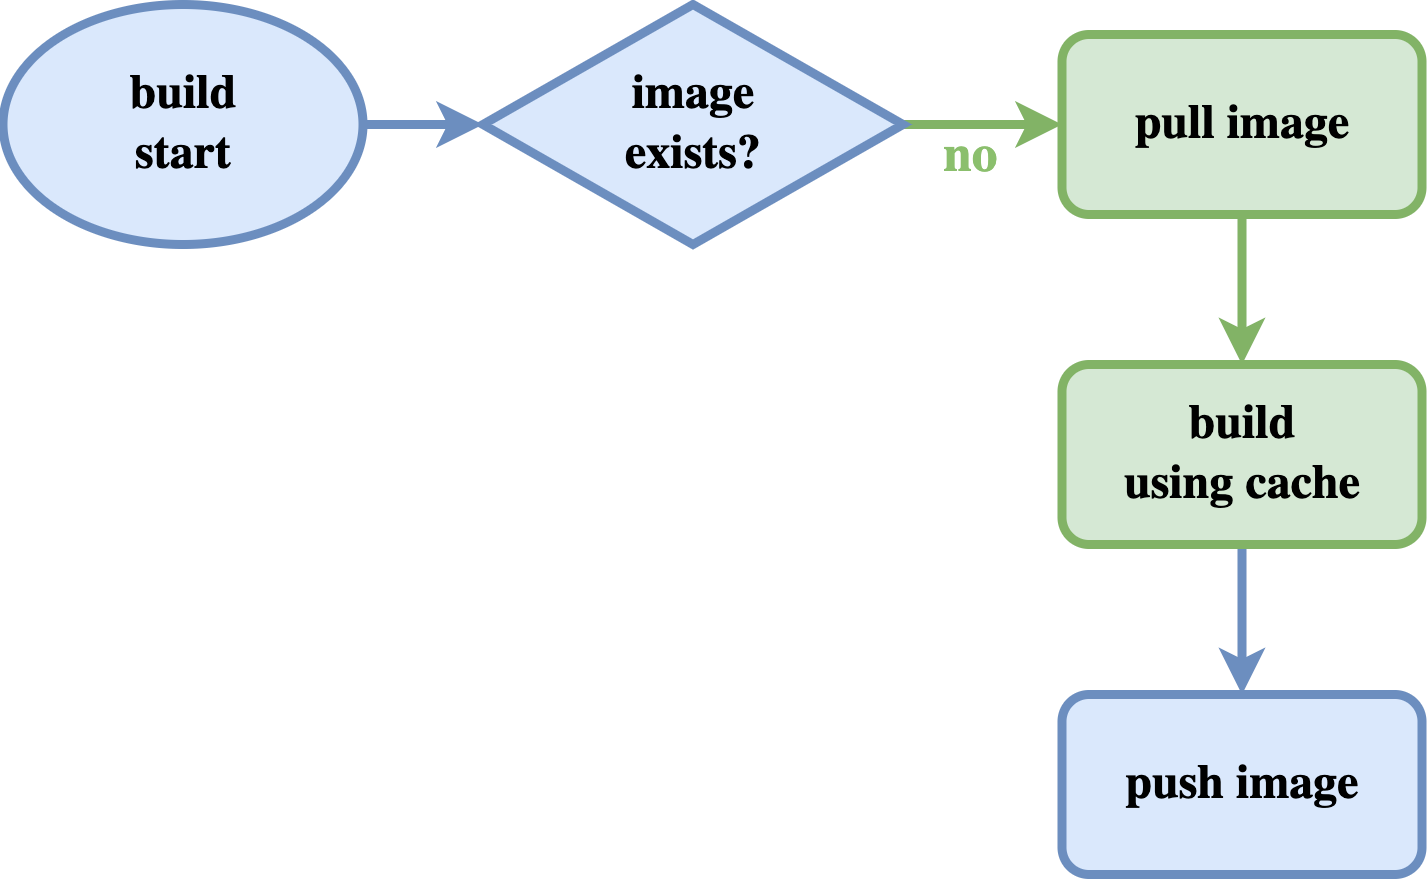
To fix the issue in the above scenario, we will need a way to instruct Docker to use the cache from the previous build. We can just simply pull the latest image from our docker repository in the runner machine for each job before building the image. So that we can use the cache of the previously built image.

Speed up Docker image building process by pulling the image first
To use the cache from the previously built image we can use the --cache-from option on the build command. This option will take an image name from where we want to use it as the cache source.
Consider this Dockerfile:
FROM python:3.8

ENV TZ=Asia/Dhaka
RUN ln -snf /usr/share/zoneinfo/$TZ /etc/localtime && echo $TZ > /etc/timezone

WORKDIR /app
ADD requirements.txt .

RUN pip install -r requirements.txt
COPY ./code .

EXPOSE 5000
The process for building this Dockerfile could be the following:
- Pull the image with the
latesttag - Build the image with
--cache-fromflag to use cache from previously built layers, & create both the latest tag and our chosen tag - Push both of the tags
# Step 1
docker pull docker.myrepo.com/awesome-image:latest

# Step 2
docker build .
  --cache-from docker.myrepo.com/awesome-image:latest
  -t docker.myrepo.com/awesome-image:latest
  -t docker.myrepo.com/awesome-image:1.4.7

# Step 3
docker push docker.myrepo.com/awesome-image
What If?.. we use multi-stage Dockerfile 🐳
For multi-stage Dockerfiles, usually, there are one or more builder stages where we build the application. During the build process, the container environment can be polluted by build dependencies which might not be required for the application to run. So we pull a fresh base image in the final stage and copy over only the application files to the final stage from the previous builder stage. Thus the final build couldn’t really use the layer cache from the builder stage since the final stage is based on a different image. When some project files change it will always try to build the image and for the changes detected it won’t be able to use the cache from the latest tag. So, what do we do in this case?
Here’s a Dockerfile with multi-stage build:
# BUILDER STAGE
ARG GO_VERSION=1.12.7
FROM golang:${GO_VERSION}-alpine AS builder

# Create the user and group files
# that will be used in the running container
# to run the process as an unprivileged user
RUN mkdir /user && \
    echo 'nobody:x:65534:65534:nobody:/:' > /user/passwd && \
    echo 'nobody:x:65534:' > /user/group

WORKDIR /src
COPY ./ ./
RUN CGO_ENABLED=0 GOOS=linux go build -a -o /app .

# FINAL STAGE
FROM scratch AS final

COPY --from=builder /user/group /user/passwd /etc/
COPY --from=builder /app /app
USER nobody:nobody

ENTRYPOINT ["/app"]
The build process for multi-stage build would be:
- Pull the image with the
buildertag - Build and tag a new
builderimage using--targetoption to set the builder stage and use--cache-fromoption to use the layer caching. - Build the final image by using cache from the builder stage and tag with the
latest& our favorite tag. - Push both builder, latest, and our favorite tags.
# Step 1
docker pull docker.myrepo.com/awesome-image:builder

# Step 2
docker build . --target builder
  --cache-from docker.myrepo.com/awesome-image:builder
  -t docker.myrepo.com/awesome-image:builder

# Step 3
docker build .
  --cache-from docker.myrepo.com/awesome-image:builder
  -t docker.myrepo.com/awesome-image:latest
  -t docker.myrepo.com/awesome-image:1.4.7

# Step 4
# pushes 'builder', 'latest' & '1.4.7' tags
docker push docker.myrepo.com/awesome-image
Cool! But can we do some magic? 🎩
Yes, but depends on the tool. Some CI tool supports special commands or configurations to have the cache from the previous build automatically. For example, CircleCI has a configuration like this below:
our_job_name:
   machine:
      docker_layer_caching: true
That automatically does all the trick that we have done manually above.
I tried to share how I approached and solved the issue of Docker build speed in the CI environment. Hope the readers will find these simple tips helpful and can use them to improve their build pipelines.